Transform Your Kitchen Scraps into Culinary Gold: The Magic of Homemade Vegetable Stock
Imagine turning forgotten onion peels, carrot tops, and wilting herb stems into a rich, aromatic base that elevates your cooking from ordinary to extraordinary. This isn't just wishful thinking; it's the simple, sustainable magic of homemade vegetable stock. Far more flavorful and wholesome than its store-bought counterparts, making stock from scraps is a testament to mindful cooking, reducing kitchen waste, and unlocking unparalleled depth in your everyday dishes.
At its heart, making homemade vegetable stock is a journey of transformation. It's about extracting every last drop of goodness from ingredients you might otherwise discard, creating a versatile liquid foundation for soups, stews, risottos, sauces, and so much more. This guide will walk you through the process, revealing the secrets to a deeply satisfying, incredibly flavorful stock made entirely from what you already have.
The Art of Scrap Collection: What to Save, What to Skip
The first step to magnificent homemade vegetable stock is knowing which scraps are your allies and which are best left out. Think of your freezer as a culinary treasure chest, ready to hold the building blocks of your next gourmet creation. As you prep meals throughout the week, instead of tossing those bits and bobs, simply pop them into a dedicated freezer-safe bag or container.
Your Stock's Best Friends: The Essential Scraps
These are the aromatic heroes that will lend your stock a beautiful color and robust flavor profile:
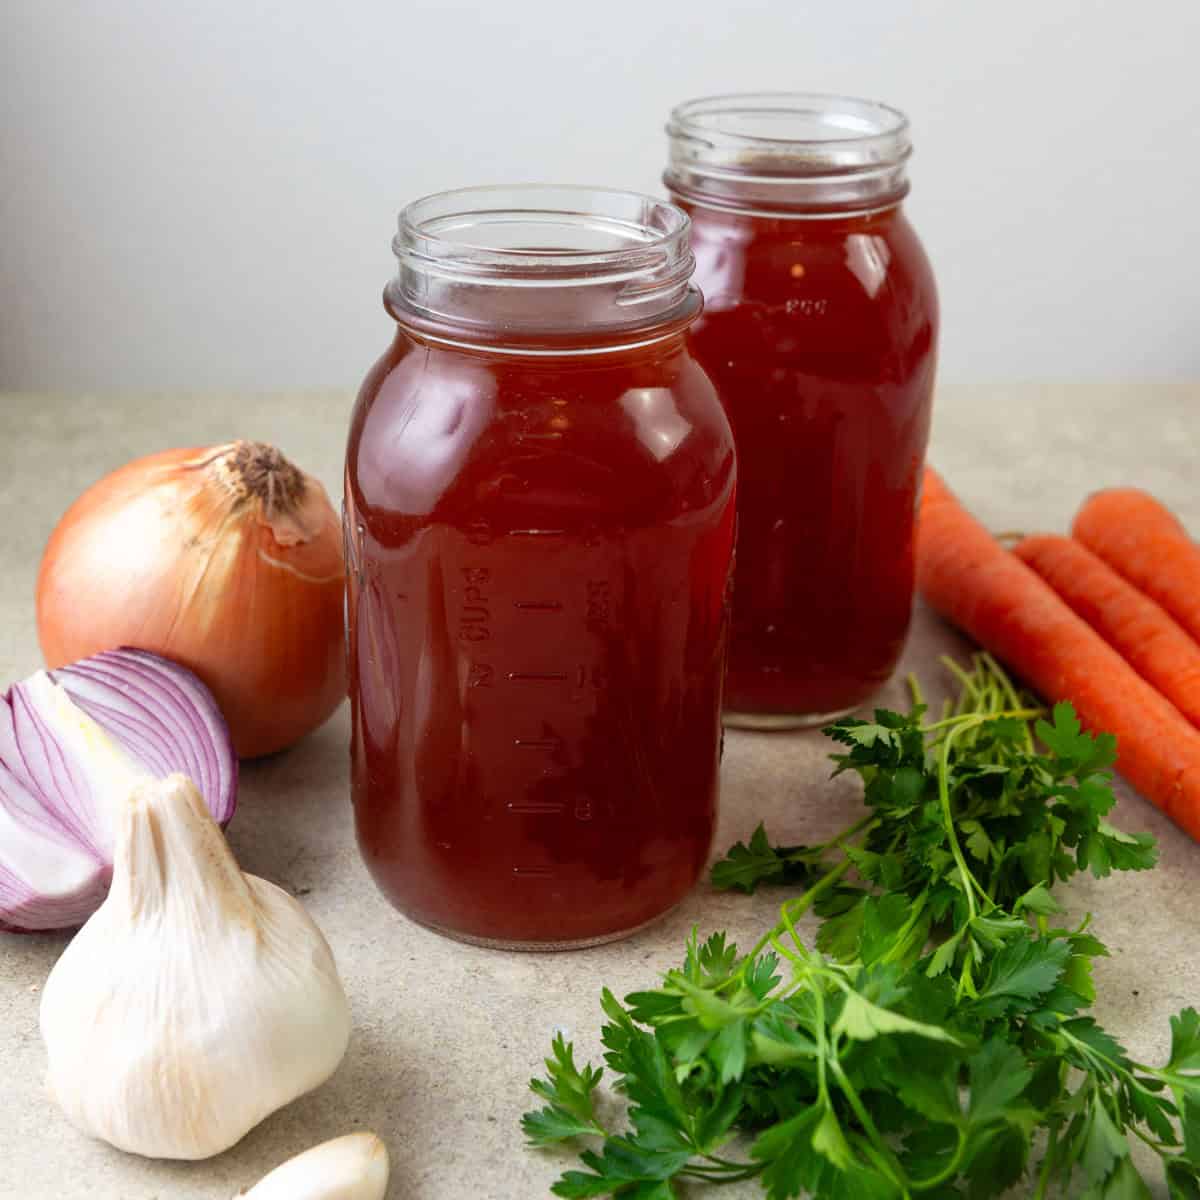
- Onion Peels & Ends: Yellow and white onion skins are fantastic for a golden hue and savory depth. Red/purple onion skins will impart a darker, reddish tint, but the flavor remains equally delicious.
- Garlic Skins & Ends: Mellows wonderfully during simmering, adding subtle sweetness.
- Carrot Peels & Ends: A classic stock ingredient, contributing sweetness and a lovely orange color.
- Celery Root Ends & Leaves: Offers a foundational savory note.
- Mushroom Stems: Packed with umami, these are a secret weapon for a rich, earthy stock.
- Herb Stems: Parsley, cilantro, dill, rosemary, and thyme stems are bursting with flavor. Just be sure they’re clean and not too woody.
- Bell Pepper Cores & Tops: Adds a gentle sweetness and aromatic complexity.
- Leek Greens: The dark green tops of leeks, often discarded, are perfect for stock.
- Fennel Tops & Outer Layers: Imparts a subtle, aniselike freshness.
- Corn Cobs: After enjoying the kernels, save the cobs for a surprisingly sweet and deep addition to your stock.
- Hardy Green Stems: Stems from kale, chard, or collard greens can add earthy notes.
For an even deeper dive into selecting the perfect ingredients, be sure to read our guide on Best Veggies & Tips for Rich Homemade Vegetable Stock.
The Scraps to Skip (and Why)
Not all vegetable scraps are created equal. Some can detract from the flavor or appearance of your homemade vegetable stock:
- Potatoes & Zucchini: Too starchy, they can make your stock cloudy and impart an undesirable texture.
- Cruciferous Vegetables (Cauliflower, Cabbage, Brussels Sprouts): While their stalks can sometimes work in small quantities, their florets and leaves tend to produce a strong, sulfurous odor and an overpowering, bitter flavor when simmered for extended periods.
- Beet Peels & Stems: Unless you want a vibrant pink or red stock, it's best to avoid these as they will heavily color your liquid.
- Spoiled Scraps: This might seem obvious, but only use scraps that are still fresh enough to eat (even if a bit tired). Moldy or rotten vegetables will only introduce off-flavors.
Continue collecting your chosen scraps in your freezer bag until it's about half to two-thirds full, typically around 1-2 pints. This ensures you have enough material to create a robustly flavored stock.
Brewing Your Liquid Gold: The Simple Process
Once your freezer bag is brimming with potential, the process of transforming those scraps into fragrant homemade vegetable stock is incredibly straightforward. It's a low-effort, high-reward culinary endeavor.
- Gather Your Bounty: Empty your frozen vegetable scraps into a large, sturdy pot. A 6-quart pot is usually ideal for a half-full produce bag of scraps.
- Hydrate & Infuse: Cover the vegetable scraps with cold water, adding just enough to submerge them completely – typically 5 to 6 cups. Resist the urge to overfill, as too much water will dilute the flavor. This is also the time to add your foundational aromatics:
- 2-3 bay leaves
- 5-7 whole peppercorns
- A pinch of salt (optional, see notes below)
- Optional umami boosters: A dried mushroom or two, a small piece of kombu (seaweed), or even a Parmesan cheese rind (omit for vegan stock) can add incredible depth.
- Gentle Simmer: Bring the pot to a gentle simmer over medium heat. Once it reaches a simmer, reduce the heat to low, cover partially, and let it cook for at least 1.5 to 2 hours. The longer and gentler the simmer, the more flavor will be extracted. You'll know it's ready when the kitchen is filled with an inviting aroma and the liquid has taken on a rich, golden or amber hue.
- Strain & Savor: Let the stock cool slightly in the pot. Then, carefully remove the larger vegetable pieces with tongs or a slotted spoon. For a beautifully clear stock, strain the liquid through a fine-mesh sieve (lined with cheesecloth if you have it) into a clean heatproof container. Press down lightly on the solids to extract any remaining liquid, but avoid mashing them vigorously, as this can release starchy flavors. Discard the spent solids – they've given all their goodness!
The simplicity of this process makes it approachable for any home cook, proving that easy homemade vegetable stock is truly within reach.
Elevating Your Stock: Tips for Maximum Flavor & Versatility
While the basic method yields fantastic results, a few expert tips can take your homemade vegetable stock from good to truly exceptional.
- The Water-to-Scrap Sweet Spot: As mentioned, don't overfill with water. The goal is to just cover the scraps. This ensures maximum flavor concentration. If you find your stock is simmering down too much, you can add a little hot water, but generally, let the flavor deepen.
- Salt Savvy: Adding a pinch of salt during simmering helps extract flavor. However, if you plan to reduce your stock significantly for a sauce or gravy, or use it in recipes that are already salty, consider omitting it during the stock-making phase. You can always season to taste later.
- Roast for Depth: For an even richer, deeper flavor profile, consider roasting some of your scraps (especially onion, carrot, and mushroom pieces) in a little oil before adding them to the pot. This caramelizes their sugars, adding layers of umami and a darker color.
- Patience, My Friend: A low, slow simmer is key. Don't rush the process with a rolling boil, which can make your stock cloudy and extract bitter notes. Gentle bubbling for at least two hours is ideal.
- Herb Harmony: Experiment with different fresh herb stems. Rosemary and thyme offer robust, earthy notes, while parsley and cilantro stems provide a fresher, brighter character. Match the herbs to the kind of dishes you anticipate using the stock for.
- Embrace Onion Hues: Remember that red or purple onion skins will give your stock a reddish tint. If you prefer a classic golden stock, stick to yellow or white onion peels. The flavor won't be dramatically different, but the color certainly will be.
Beyond the Pot: Storing and Using Your Homemade Treasure
Once your beautiful homemade vegetable stock is strained and cooled, it's time to think about storage and all the delicious ways you'll use it.
Storage Solutions:
Proper storage ensures you have this liquid gold on hand whenever inspiration strikes:
- Refrigeration: Once completely cooled, store your stock in airtight containers in the refrigerator for up to 3-5 days.
- Freezing for Longevity: For longer-term storage (up to 6 months), freezing is your best bet.
- Ice Cube Trays: Freeze stock in ice cube trays for convenient, small portions perfect for sautéing vegetables, deglazing a pan, or boosting a sauce. Once solid, transfer the cubes to a freezer-safe bag.
- Freezer-Safe Containers/Bags: Store larger portions in plastic freezer containers or heavy-duty freezer bags. Be sure to leave some headspace if using rigid containers, as liquids expand when frozen.
- Labeling: Always label your containers with the date so you know how long they've been stored.
Culinary Applications:
The versatility of homemade vegetable stock is truly astounding. It's not just for soup!
- Soups & Stews: The most obvious use, providing a rich, savory foundation.
- Risottos & Grains: Essential for creamy risottos, fluffy couscous, and flavorful rice pilafs.
- Sauces & Gravies: Use it as the liquid base for pan sauces, gravies, or to thin out pureed vegetable sauces.
- Braising: Braise vegetables, tofu, or even lean meats for tender, flavorful results.
- Sautéing & Steaming: Use a splash of stock instead of oil or water when sautéing vegetables for an extra boost of flavor.
- Poaching: Poach eggs, fish, or chicken in stock for a delicate and flavorful cooking method.
- A Comforting Drink: Sometimes, a warm mug of savory, nourishing stock is all you need to warm you from the inside out.
Making homemade vegetable stock from scraps is more than just a recipe; it's a philosophy. It’s about valuing every part of your ingredients, embracing sustainability, and enriching your cooking with layers of natural, unadulterated flavor. By transforming what once might have been waste into a culinary foundation, you unlock endless possibilities in your kitchen. So, start saving those scraps, embrace the simple process, and discover the profound satisfaction of crafting your own liquid gold.
